INSTALLATION GUIDE
Choose the correct installation guide for your Trimui Smart Pro setup: one tailored for the factory OS and another for CrossMix OS. Each guide provides a step-by-step process, ensuring a smooth setup of the KUI interface specific to your operating system. Follow along to enjoy the enhanced visual experience of the KUI theme on your device.
Installation Steps:
Use KUi Instalelr App.
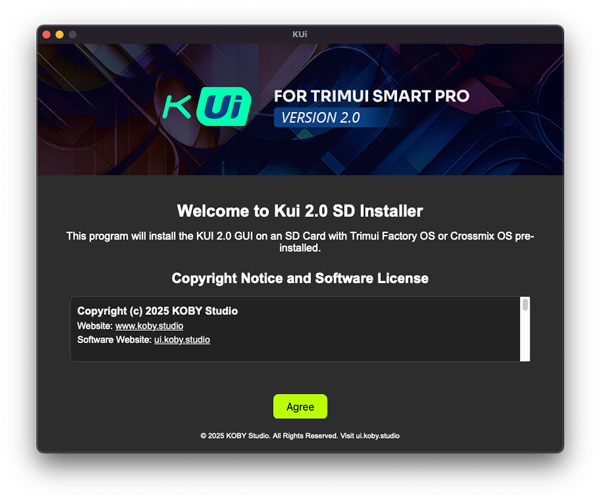
Launch the KUi Installer app and accept the software terms and conditions to continue.
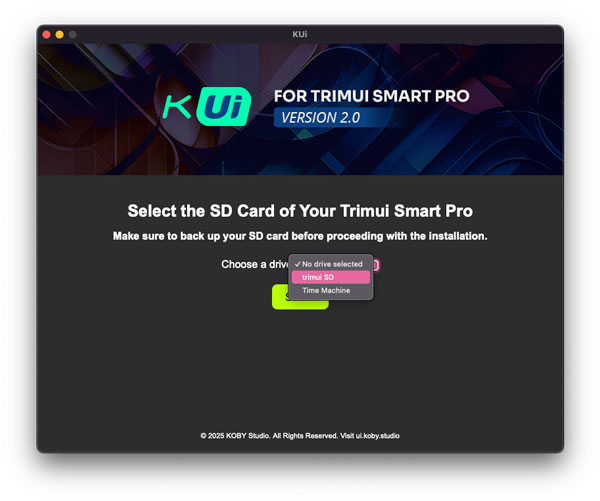
Insert your SD card with the factory system into your computer and click CONTINUE.

Now select your SD Card with the factory Trimui OS and click SELECT
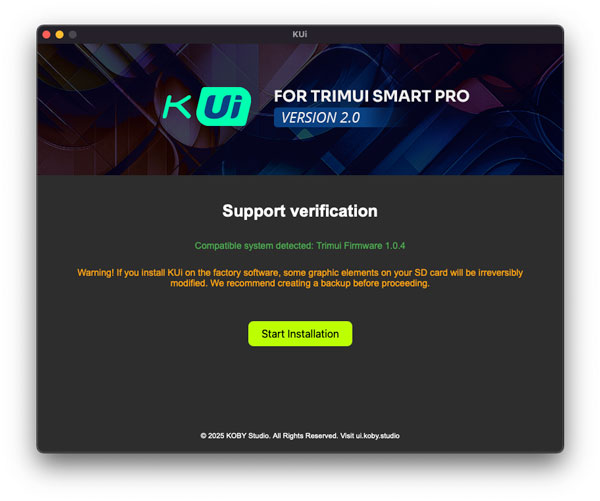
The application will check for the operating system on the SD card. Do not use SD cards with unsupported operating systems. Once the verification is successful, you can start the installation by clicking on STARTING INSTALLATION
NOTE: Installation on the factory operating system requires overwriting some graphical elements present on the SD card, these changes will be irreversible. To restore the old interface, you will need to reinitialize the SD Card with the factory system. If you want a completely reversible change, install KUi 2.0 on Crossmix OS.
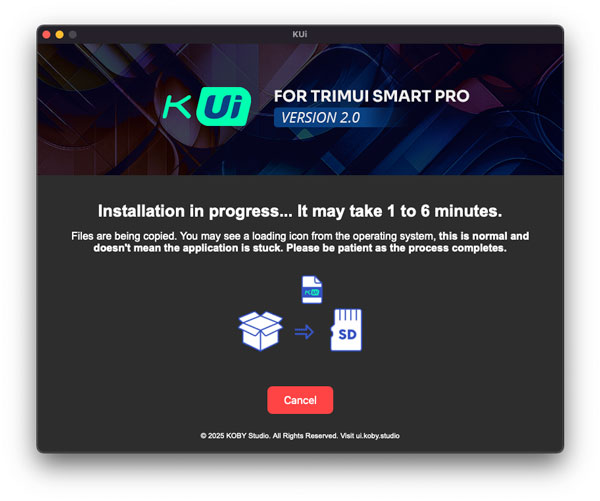
Wait for the files to copy. It can take 1 to 6 minutes depending on the speed of your SD card and your computer.
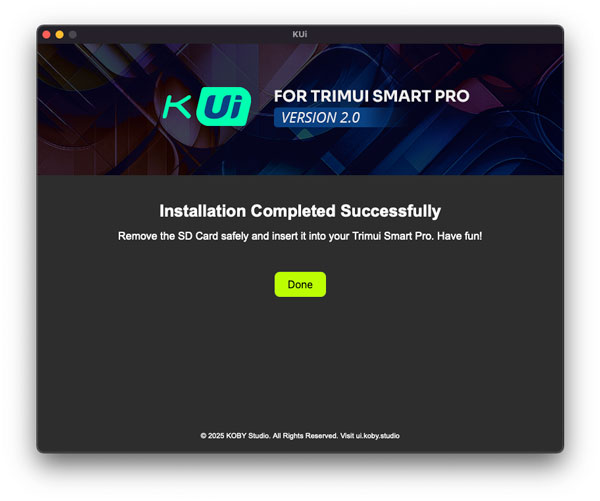
Once the installation is complete, click on DONE. Insert the SD card into the Trimui Smart PRO and turn it ON.
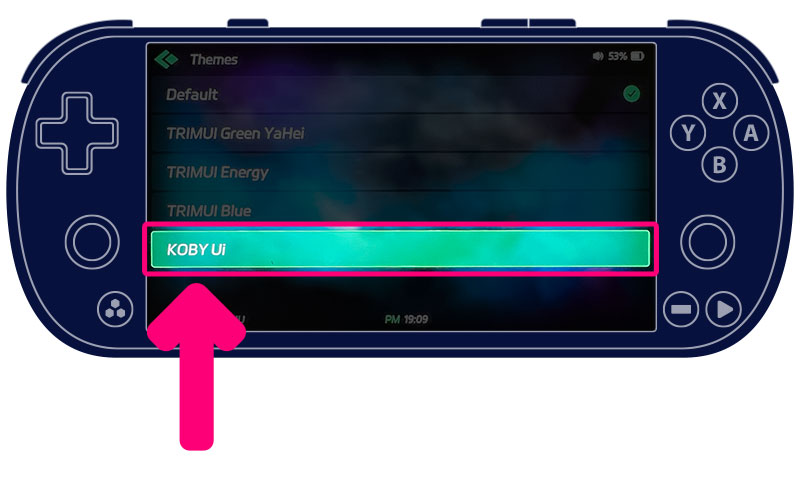
Select KOBY Ui Theme.
Once the console is turned on, go to settings and select THEME.

Then select KOBY Ui from the theme list and press B.
Now restart the console to clear the cache. Enjoy your new interface!
Installation Steps:
Use KUi Instalelr App.
Launch the KUi Installer app and accept the software terms and conditions to continue.
Insert your SD card with the factory system into your computer and click CONTINUE.
Now select your SD Card with Crossmix OS and click SELECT
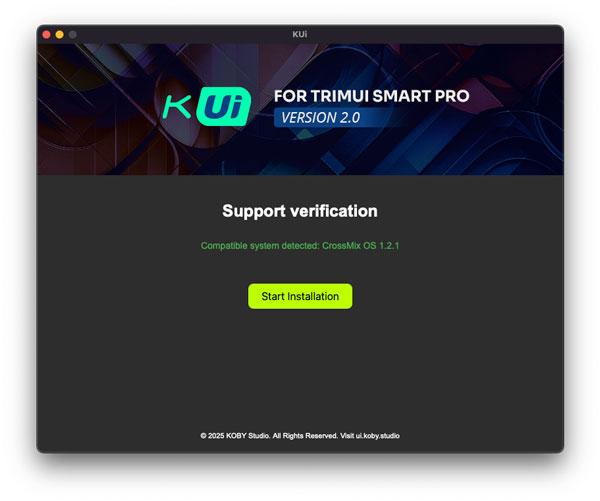
The application will check for the operating system on the SD card. Do not use SD cards with unsupported operating systems. Once the verification is successful, you can start the installation by clicking on STARTING INSTALLATION
Wait for the files to copy. It can take 1 to 6 minutes depending on the speed of your SD card and your computer.
Once the installation is complete, click on DONE. Insert the SD card into the Trimui Smart PRO and turn it ON.
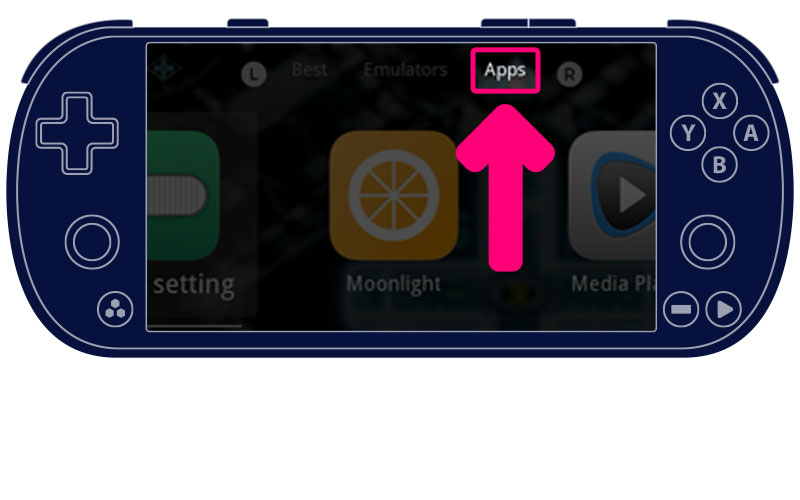
Select KOBY Ui Theme. IMPORTANT!
Once the console is turned ON, navigate to the APPS section (NOT Settings menu).
Select SYSTEM TOOLS from the list of apps. If you don't see the System Tools App, click here
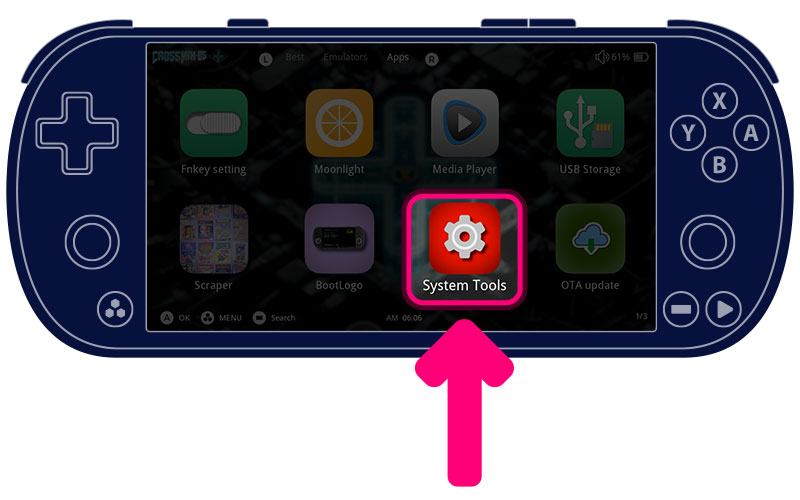
Inside the System Tools App choose THEME.
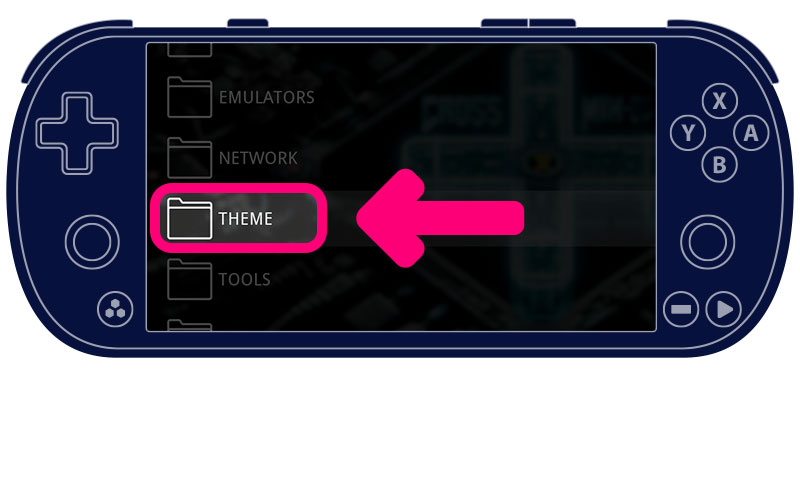
Now select THEME PACK.

You’ll see a list of available themes. Select KOBY Ui.
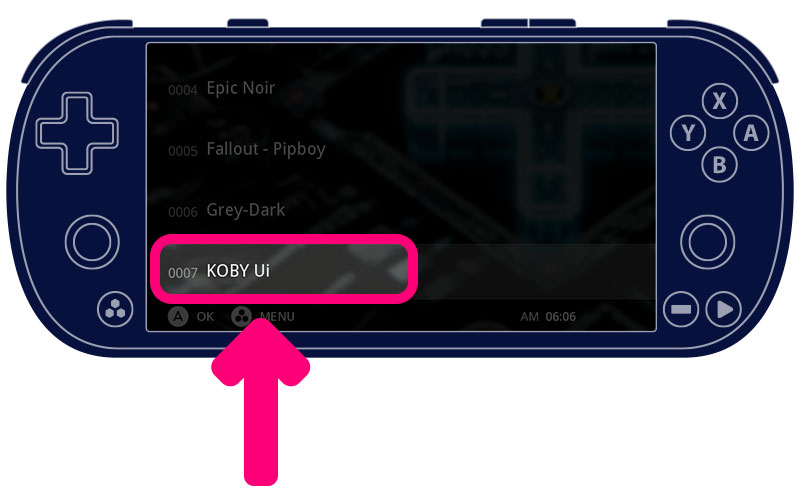
Restart your Trimui Smart Pro to clear any cached data and apply the new graphical interface.
FULL CUSTOMIZATION. IMPORTANT!
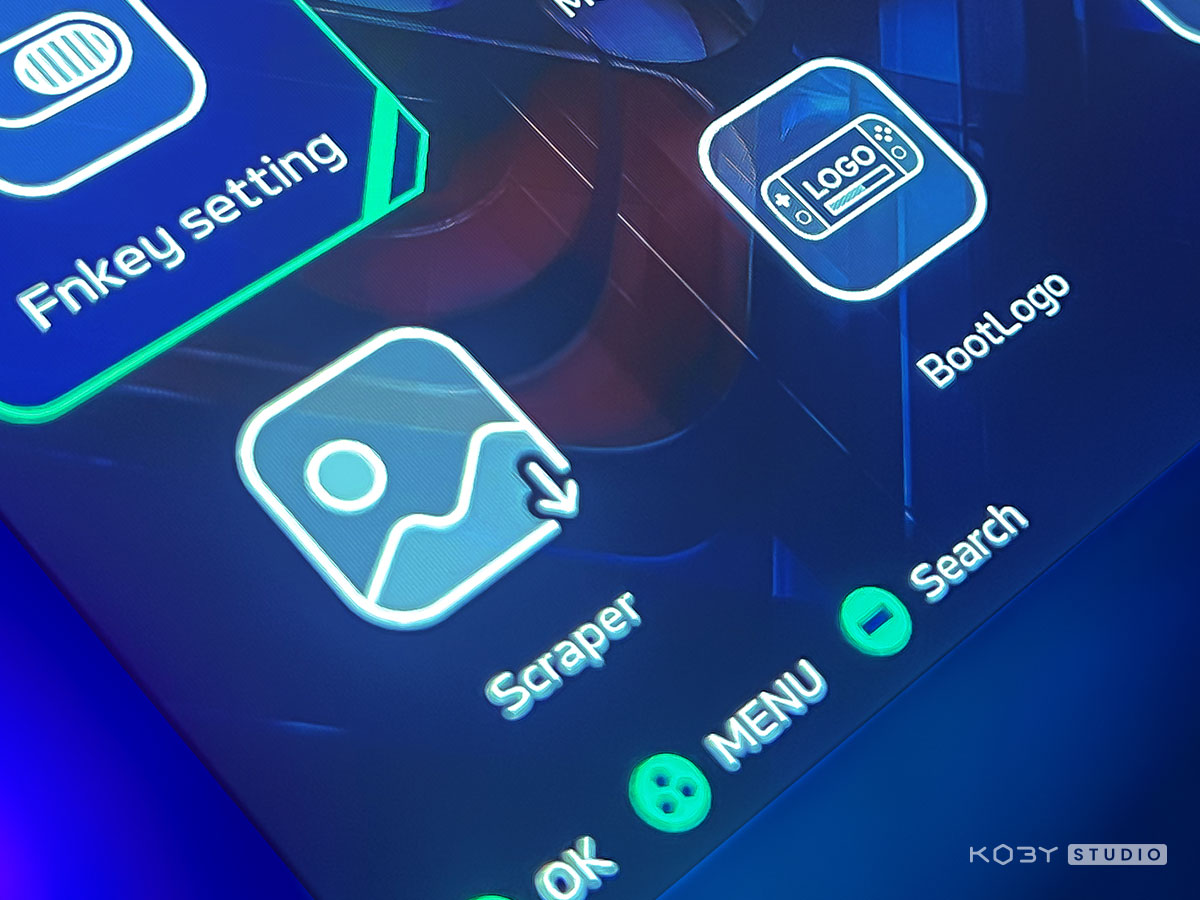
You can achieve full customization by changing the application icons as well.
Simply enter the APP menu and launch the KUi Switcher application.
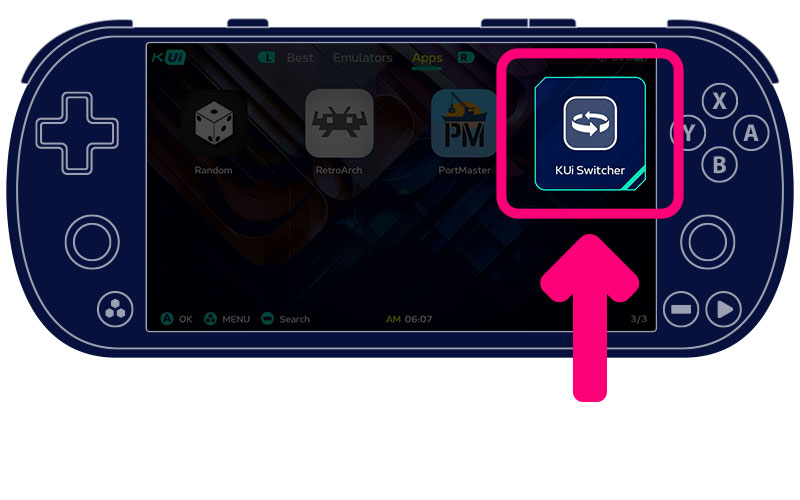
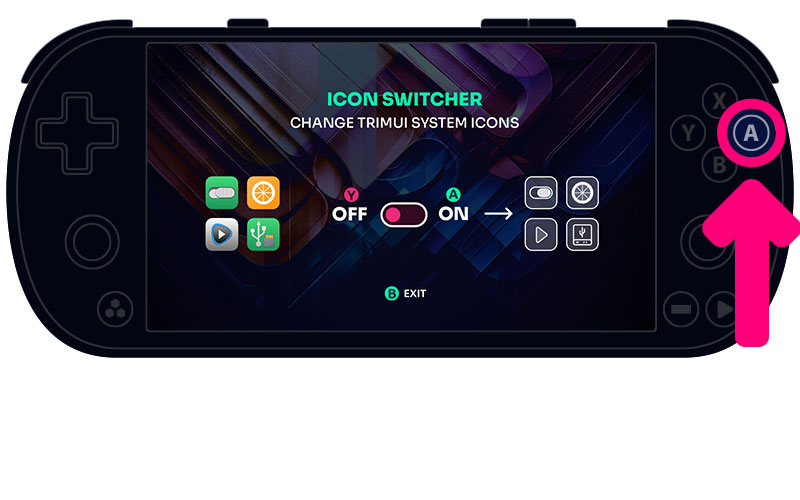
This app allows you to choose between the default application icons and those styled in KOBY Ui by changing the switch state
(Button Y = OFF | Button A = ON)
Enjoy your refreshed and streamlined experience on the Trimui Smart Pro with the KOBY Ui and Crossmix OS.
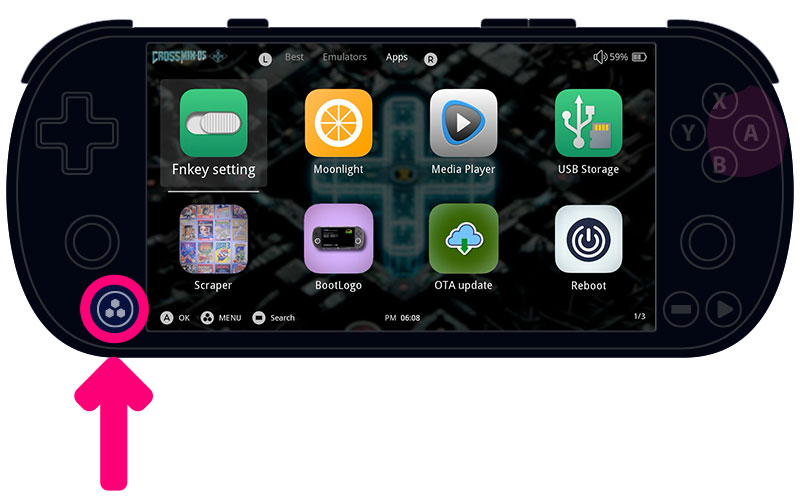
Can't find the System Tools app?
Go to the APPS menu, then press the MENU BUTTON on the Trimui Smart Pro (below the left pad).
Select Edit and scroll through the list of applications until you find System Tools.
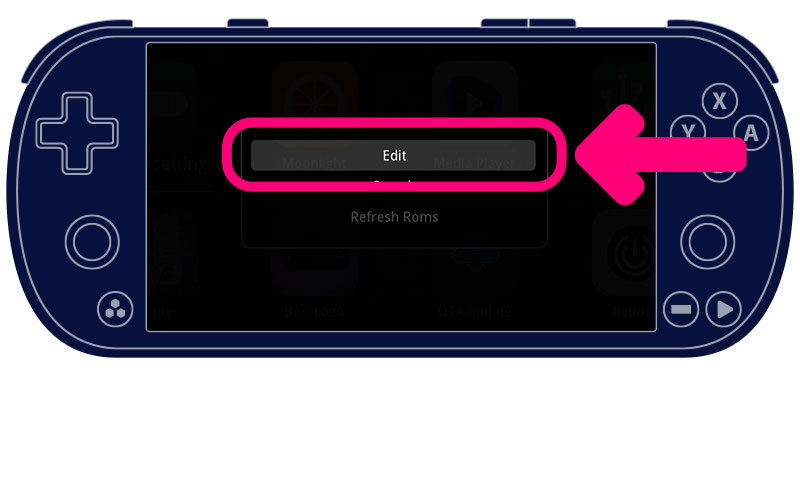
Use the B button to select it (make sure the check is marked).

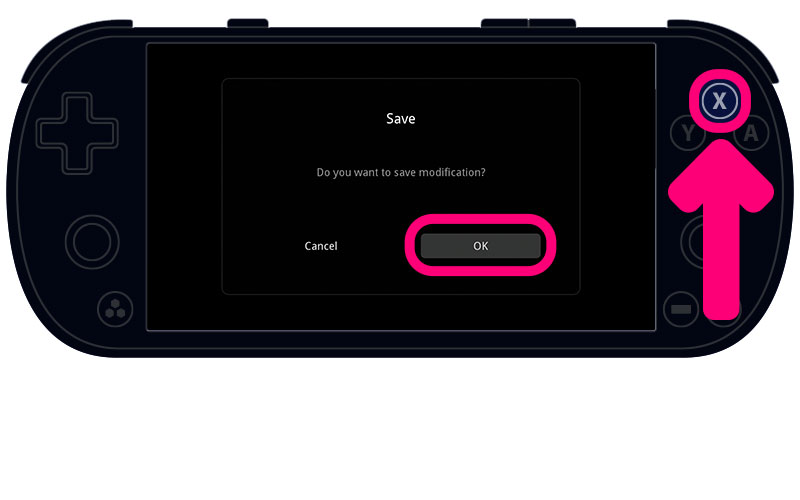
Press the X button and select OK, use the B button to save the changes. Now the System Tools application will be visible among your applications.
Now the System Tools application will be visible among your applications.
